CUSTOM HOMES DRYWALL · 10 MIN READ
Custom Homes Drywall: Boarding, Taping & Level 5 Finishing in the Lower Mainland
A field guide to drywall on custom homes — boarding strategy, taping, mudding, and Level 5 finishing that holds up under raking light and designer paint.
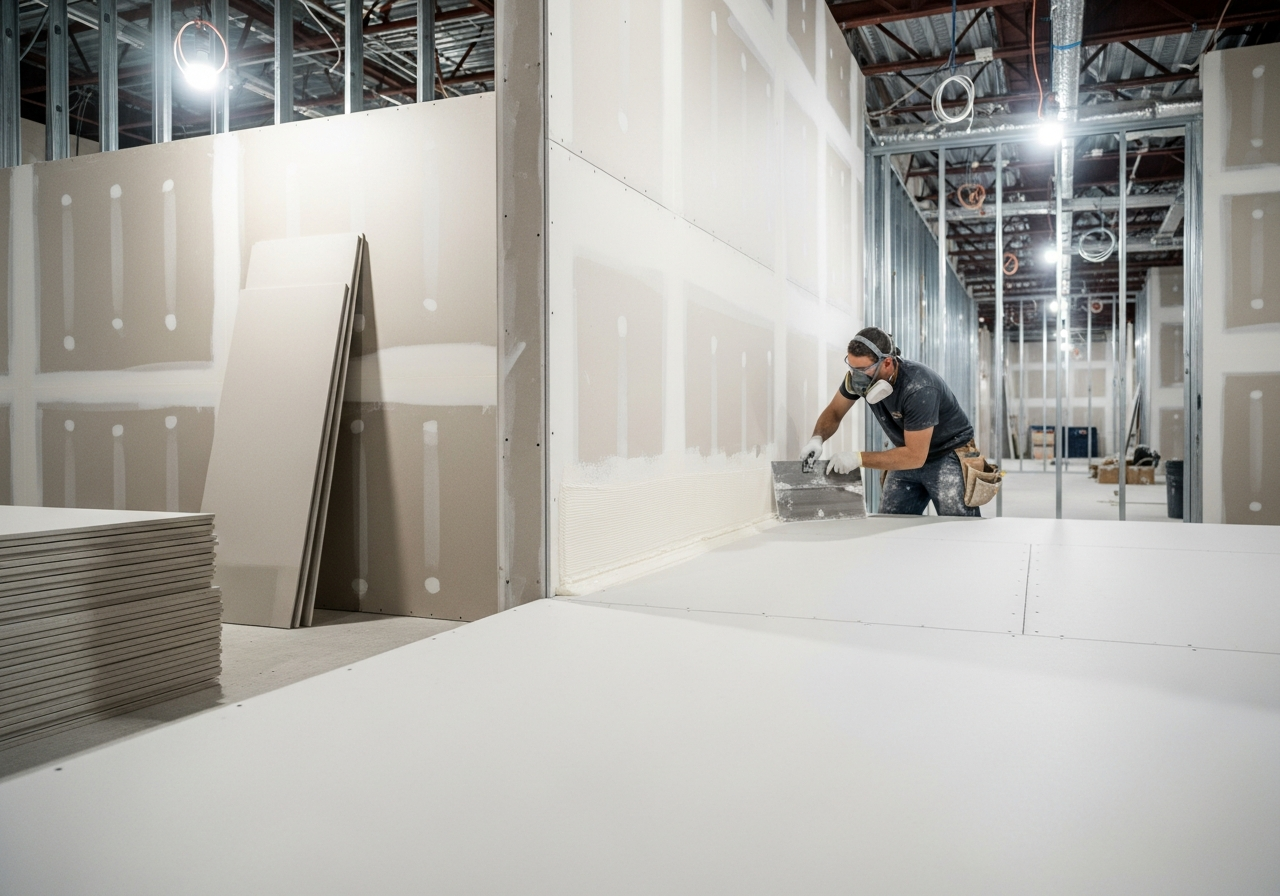
On a custom home, the drywall doesn't get its own line item in the marketing brochure — and that's exactly the point. Drywall is the surface every other trade gets judged against. Paint either lays flat or it doesn't. Lights either wash a wall evenly or they spotlight every flaw. Casework either butts cleanly into a return or it shows a 1/16" gap. Get the boarding, taping and finishing right and the rest of the home reads as expensive. Get it wrong and a million-dollar house looks like a flip. This is a field guide to how Rambo Walls & Ceilings handles drywall on custom homes across Vancouver and the Lower Mainland, from boarding the rough frame to a true Level 5 finish under raking morning light.
Start before the boards arrive: framing prep
The best drywall finish in the world cannot save a framing job that wasn't strung. We walk every custom home before we order board — checking the wall planes with a 6-foot level, sighting ceiling joists for sag, and flagging any stud crowned more than 1/4". Crooked studs get planed, twisted ones get sistered, and any junction where two materials meet (wood to steel, beam to stud) gets a hat channel to float the transition.
Backing is the other invisible-but-critical step. Every TV mount, every grab bar location, every floating-vanity bracket, every curtain rod and every art-light gets a piece of 2x10 fly-blocking installed before the rock goes up. We mark each backing on the framing in red Sharpie and shoot a photo to the homeowner — six months later when they want to hang a 90-pound mirror, the photo tells them exactly where to drill.
Boarding strategy — orientation, fasteners, and edges
On ceilings we run 5/8" Type X horizontally across the joists in the longest practical sheets, screws every 12" in the field and 8" at the edges. On walls we go horizontal as well, with the factory edge tight to the ceiling and the cut edge to the floor. Horizontal boarding cuts the linear footage of butt joints — and butt joints are where finishes fail.
Where we have to butt, we use a butt-board (a strip of OSB recessed behind the joint) so the two pieces of board can pull together into a slight valley. That valley fills with mud and disappears. A butt joint on a flush surface, mudded flat, will telegraph forever.
Around windows we run the board past the opening and cut after, never picture-frame the rough opening. That single habit eliminates the cracks that radiate from window corners six months after the heat is turned on for the first winter.
Taping and mudding to Level 4 — the standard for paint
Level 4 is the industry baseline for any wall that's going to be painted in a flat or eggshell sheen under normal lighting. It means three coats of compound on flats and bevels, two coats on fasteners, paper tape embedded in the first coat, and the whole thing sanded to a uniform surface.
Our taping rhythm on a custom home runs like this: day one, paper-tape every joint and fill the screw heads with a quick first coat. Day two, a wider second coat with a 10" knife, feathered out 8" past the joint. Day three, a final skim with a 12" knife and a final pass on the screws. We let each coat dry overnight before sanding — never the same day — to keep the mud from rolling.
Outside corners get steel bead on anything below shoulder height, paper-faced bead on cathedral ceilings and any corner that needs to look like a knife edge. Where the homeowner has selected a square archway with no casing, we run an L-bead for a hard, paintable terminator.
Level 5 — when raking light is the test
A Level 5 finish is a full skim coat over the entire wall, sanded to a porcelain surface, primed with a high-build drywall primer. We don't do Level 5 on every wall — it would double the price of the drywall scope on a 6,000-square-foot home — but we always do it on the walls that earn it: the entry hallway, the great-room walls under floor-to-ceiling glass, any wall washed by integrated cove lighting, and any wall that's painted a dark or high-gloss colour.
The reason is simple: raking light (light striking a wall at a low angle) magnifies every imperfection. A Level 4 wall under raking light shows tape lines, butt joints, and screw dimples. A Level 5 wall reads as a single, continuous plane.
We use an airless sprayer with a fine tip to lay the skim coat, then back-roll with a 1/4" nap before it sets. After it dries, two passes with a 220-grit pole sander and a vacuum-attached drywall sander leaves a surface a designer will run their hand across and not ask a question.
- Walls under wall washers — Level 5
- Walls beside or below floor-to-ceiling glass — Level 5
- Walls painted in dark or high-gloss colours — Level 5
- Standard bedroom walls in flat or eggshell — Level 4
- Closet interiors and mechanical rooms — Level 3 with hot mud
Sanding, cleanup, and the handoff to paint
Dust is the lasting impression a drywall crew leaves on a custom home. We sand exclusively with vacuum-attached pole sanders and HEPA shop vacs, then double-pass the whole site with a damp microfiber before paint touches the walls. Any cabinetry, glazing, or hardwood that's already installed gets fully draped and taped — drywall dust on raw oak is a stain we don't make the painters fix.
Before we leave we walk the home with the painter and the GC, light each wall with a 500-watt LED handheld at a 15-degree angle, and mark any defect with painters tape. Every flag gets touched up and re-sanded the next morning. The painter primes a perfect surface; the homeowner moves into a house that looks the way the renderings looked.
Frequently asked questions
- What's the difference between Level 4 and Level 5 drywall?
- Level 4 is three coats of compound on joints, two on screws, sanded smooth — standard for most painted walls. Level 5 adds a full skim coat over the entire surface, eliminating the texture difference between mudded areas and bare paper. Level 5 is required for walls under raking light, high-gloss paint, or large unbroken planes.
- Should I use 1/2" or 5/8" drywall in a custom home?
- We board ceilings in 5/8" Type X for sag resistance and fire performance, and walls in 5/8" Type X as standard. The extra stiffness at light switches and corners is noticeable, and the cost difference over the whole house is a few hundred dollars.
- How long does drywall take on a 5,000-square-foot custom home?
- Roughly 3-4 weeks for boarding and a Level 4 finish, with another 5-7 days added if any walls require Level 5. We typically board for a week, tape for two, then sand and walk for defects in the final week.
- Do you handle abuse-resistant drywall for mudrooms and hallways?
- Yes. We use AR-rated board (Gold Bond XP or USG Sheetrock Mold Tough AR) in mudrooms, pantries, kid hallways and behind any door that swings hard. The cost premium is small and it eliminates the dings that show up in year two.
Have a project that fits this scope?
Call Mason directly or send drawings — we quote walls, ceilings and framing across Vancouver & the Lower Mainland, BC.
Keep reading
Steel Stud Framing
Steel Stud Framing for Residential Condo Renovations & Drywall in Vancouver
T-Bar Ceilings
T-Bar Ceilings for Residential & Commercial Projects in Vancouver and the Lower Mainland
Tenant Improvements